Sub-Total: $0.00
HOP Into Your Own Brew
Living on the Central Coast of California affords me the privilege of having breweries and wineries everywhere. I was inspired to start an experiment, so from a great online source, I purchased 2 different hop Rhizomes- a Cascade and Chinook cultivars in this Blog I want to share the first steps on the journey .
History of Hops
The first commercial hops were harvested in 1791. The first documented use of hops in beer is from the 9th century, though Hildegard of Bingen, 300 years later, is often cited as the earliest documented source. Before this period, brewers used a “gruit“, composed of a wide variety of bitter herbs and flowers, including dandelion, Burdock root, marigold, horehound (the old German name for horehound, Berghopfen, means “mountain hops”), ground ivy, and heather

Scientific classification
Kingdom:Plantae
Clade:Tracheophytes
Clade:Angiosperms
Clade:Eudicots
Clade:Rosids
Order:Rosales
Family:Cannabaceae
Genus:Humulus
Species: H. lupulus
Binomial name Humulus lupulus
Understanding Plant Classification (awesuccsspinesandpetals.com)

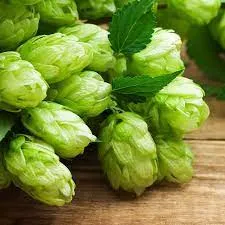
The hop plant (humulus lupulus) is a vigorous perennial that stores its energy and spreads from the root stock or rhizomes. It sends out climbing bines, which are distinct from vines because hops do not have suckers or tendrils to climb, and grows in a clockwise motion as it follows the sun daily. These bines can grow up to 25- 30 feet in a single year, but most commercial hop farmers use trellises that are 18 feet high
A few varietals to share
- ‘Cascade’ is a hop developed by Oregon State University that has a spicy grapefruit flavor. (Alpha acid percent: 4.5%–7%)
- ‘Centennial’ is a genetic mix of several English and European hops. It has a strong citrus scent. (Alpha acid percent: 9.5%–11.5%)
- ‘Chinook’ has a spicy, piney flavor. (Alpha acid percent: 12%–14%)
- ‘Northern Brewer’ is an English native with a mix of bitter and aromatic hops. (Alpha acid percent: 7%–10%)

The first step in growing your own hops is the planning and research stage. Hops are hardy and will thrive in almost any temperate climate, but if your desire is to maximize yield and quality there are a couple key points to keep in mind. The most important thing that hops need is sun. Lots of sun. This means at least 6-8 hours of direct sunlight per day. Hops are also photosensitive, so they use daylight length to determine when to start fruiting. Once you have a nice, sunny spot picked out, remember the vertical height requirement. Now home gardeners do not need to grow hops to the full 20 feet, but 6 feet of vertical growth should be considered the minimum. There are various ways to get hops to grow horizontally, like along a fence or pergola, but since the bines are mechanical climbers they would require daily training to keep them from growing horizontally instead of vertically. Make sure to pick a location that has well-draining soil and do not plant directly next to a structure like house or garage because hops can damage structures both above and below the soil. Ease of harvest is another key component to keep in mind. Hops are traditionally grown on twine so that the bine can be cut at the top and bottom and brought in from the field for processing. Most homegrown hops are harvested by hand, so you can either climb a ladder and pick them right off the bine, or hack them down and pick the bine clean on the ground
Calendar View

Feb to April
Once the risk of Frost is low plant the rhizomes, use roots from mature female plants . Plant in sandy well draining soil. over with 2 inches of soil.
Water heavily, wait 2 days then water lightly when vines ( known as bines) are over 1 inch begin training up poles or sturdy twine
May to July
Bines can grow up to 6 inches per day. trim away shoots at base of supports.
as a side trat pickle it or add to risotto or eggs for an asparagus like taste.
Aug to Oct.
Damp soft cones are not ready to be picked. Soft papery cones are ready to go. Hops must be dried before brewing. spread hops out and keep air circulating. They are ready when they are springy and powdery. Drying takes approximately 3 days. Compress hops into a zip top bag and freeze until ready to brew.
Nov to Jan
Winter is a time of dormancy for hops. Sit back and relax and enjoy the fruit so your labor
Maintenace and pests
Hops do not require a lot of maintenance day to day. Once they get established keep the leaves trimmed on the lower foot or two to prevent diseases or molds and mildews. Some farmers will spread elemental sulfur on the dirt and lower leaves to a similar affect. Spider mites are one of the more worrisome pests for hops, but they can usually be dealt with by spraying with neem oil or sulfur. Fine, white webs on the underside of leaves are the major sign of mites. Aphids are much easier to detect and are straightforward to deal with. Ladybugs love to feast on aphids with the ladybug larvae actually being the most effective stage for aphid eating. If ladybugs are not enough, a soap and water mixture applied directly to the aphids will work after a couple applications. However this method can potentially harm helpful bugs like ladybugs.

Depending on your growing region, mildews are potentially the biggest threat to your hops. Powdery Mildew is the biggest danger on the east coast and can be identified by white powdery patches on the leaves to start. Powdery Mildew usually displays early in the growing season (May or June) and can prevent the healthy growth and development of the hop cones. The best treatment for Powdery Mildew is prevention, because once a hop plant is infected there are very few remedies. Sulphur-based fungicides are sometimes successful if applied early enough in the fungus’ life cycle. Yellow leaves can also be caused by rain runoff from concrete patios and driveways, which washes caustic lye into the soil. A proper watering schedule with a drip system that waters right at the base of the plant will ensure a healthy plant throughout the growing season.
Hops do require a good amount of water once they get going and are far from drought-resistant. The drip system is preferred because it waters without splashing and spraying the leaves and will cut down on disease and mold exposure. Water schedule will depend heavily on your local climate and soil profile, but in general during peak summer hops should be watered every day or every other. Watering in the morning, before the sun is high in the sky, is also ideal as it will ensure that as little water evaporates as possible
A NOTE ON HOP SEX

Hop plants are gendered, with only the females producing fruit. Hop plants are also able to change gender from year to year or even within the same season. Gender switching is largely caused by environmental stresses and can even cause plants to present hermaphrodites with both female cones and male flowers. Commercial farmers rigorously patrol for male plants (commonly called stags) as their pollen will fertilize the female cones and produce seeds. Commercial hops are always tested for seed and stem content and if the seed percentage goes above 3% it can result in lower prices for the farmer and a nock to their reputation. On the homegrown scale seeds are not as much of an issue, but if your plant transitions fully to male it is best to rip it out and replant. Hermaphrodite hops are mostly impotent so there is not a risk to producing seeds, but the fruit yield will be lower on a hermaphrodite plant as it is spending energy to produce both male and female parts
Harvest
The most important thing to look at to determine proper harvest date is the lupulin glands. The lupulin glands run along the middle of the hop cone and vary from light yellow to brown in color depending on maturity. Ideally, hops will be picked when the lupulin glands are fully matured (bright orange) and not overly ripe as they will tend to have unpleasant aromas of onion and garlic if left to hang too long. Starting in the beginning of August you can start pulling off a couple cones, cut them in half with a razor blade and watch the color, shape, and aroma change even day to day. If you have access to a microscope that will give you an even better idea of the ripeness of the lupulin glands as they will start out perfectly round, but start looking more like a raindrop as they ripen. Some seasoned farmers squeeze the cones and are able to tell maturity based on feel. The young cones will feel waxy and squishy, while mature cones will feel more papery and springy. The most important thing to keep in mind for harvesting is that if you like the way it smells, then you will probably still like it after you brew with it.

Keep track from year to year on when you harvest and it will help you to really dial in the ideal harvest date. When it is time for you harvest, it is important to dress appropriately by not having exposed skin on your arms. Bines can be a bit mean and are notorious for cutting or scraping skin. Eye protection and leather gloves are also a good idea when harvesting. Depending on your growing setup, hack the hops just above the ground and cut the tops from the wire so you can lay the bine down on a table or the ground. It will take awhile to pick all the cones by hand, but the only other alternative is to put in a million dollar picker, which your neighbors might not like too much.
Once the cones are all picked you can brew with them wet, but you must use them within 24 hours, or you risk them getting slimy as they start to decompose. If you are not able to use them immediately you are able to dry them out and then store them in the freezer. Commercial kilns use high powered heaters and fans to achieve the goal of less than 10% moisture by weight. And even then it still takes 6-8 hours to properly dry them out. At home, spread the cones out on a screen or breathable fabric so that fans can blow air both under and over the layer. Airflow and temperature can be increased to decrease drying time, but it will still probably take at least 6 hours and be sure to toss or mix-up the cones so they dry out evenly. Food dehydrators are also an option, but tend to not dry many hops at once. Once the cones are properly dried it is best to vacuum seal them before tossing them in the freezer. Hops do not require any care or maintenance over the winter as long as they are cut down to the ground.

Here are 2 pictures of the two rhizomes varietals I purchased. I am very excited; they grow right away and like I read grow very fast. Stay tuned for part 2 as they mature. I will have to go shop for twine and poles very soon.
Included below is a link with recipes. I never knew that you could cook with the hops. I can’t wait to try some of the recipes.
We found at a yard sale a beer making kit, so in part 2 we will maybe show the steps there are well.
With only 3 rhizomes of each varietal, I we would noy get a very large harvest, but this was a test year.

Here are some web sites or great additional information.
Intriguing Ways to Cook with Hops – Celebration Generation
ipm_academy_2014_intro_to_hops.pdf (msu.edu)
www.BUYHOPRHIZOMES.com
#hops #brewyourownbeer #rhizome