Sub-Total: $0.00
Creating a Tea Garden: Part 2 -Tea from Seeds
Tea from Seeds is not a common ingredient most people think of when making tea but it is a change of pace from Standard leaf teas and has a unique taste.
At the bottom of the page, I will include tips on how to grow the plant and how to harvest your own seeds.

Cardamon
Botanical name- elettaria cardamomum
Health benefit: May help bad breath and sore throat
- 2 cups water
- 4 cardamom pods
- Sweetener (OPTIONAL)
1. Bring water to a boil in a tea kettle or in a small saucepan on the stove.
2. Add in the cardamom pods and turn the heat down to low.
3. Let the tea steep for 5 to 8 minutes.
4. Sweeten using brown sugar or agave.
Enjoy

Cilantro/Coriander
Botanical Name- Coriandrum sativum
Health Benefit: may benefit heart and brain, also regulating blood sugar and cholesterol
- 2 tbsp of the seeds
- 1 liter of water.
Recipe Instructions:
1. steep the seeds in boiling water for 15 to 30 minutes and then drink the water.
Enjoy

Fennel
Botanical name- foeniculum vulgare
Health Benefit: Aids digestion and breast feeding
The seed, leave or roots of this plant can be used
- 1 to 2 teaspoons of chopped fennel root.
- 1 to 2 teaspoons of whole fennel seeds- crushed.
- Cut a small bundle of fennel leaves. Bruise the whole fennel leaves or chop into large pieces to promote the release of the oil.
Recipe Instructions:
- Add the form of fennel you are using to 2 cups of water. Bring to a low boil. Very hot temperatures can destroy the volatile components of fennel, so the tea should not be brewed for longer than two or three minutes.
- Strain or decant the tea into a teapot or cup. Flavor with honey, sugar, artificial sweeteners or orange juice to taste.
- Allow the tea to cool until comfortable to drink. This typically takes five to 10 minutes. Consume without great delay.

Fenugreek
Botanical name- trigonella foenella- graecum
Health Benefit: Aids Blood Sugar and Male Sperm Count
Both seeds and leaves can be used
- 5 cups Water
- 1 Tablespoons Fenugreek Seeds or
- 2 Teaspoons of Leaves
- Sugar or Honey to sweeten optional
Recipe Instructions:
- Heat up a pot with water and allow the water to cook.
- Add the fenugreek seeds and tea leaves.
- Cook for about 5 minutes.
- Remove from the heat and let the fenugreek seeds and tea leaves sit in the hot water for 5-10 minutes.
- Strain the tea into a cup, discard the plant parts.
Enjoy
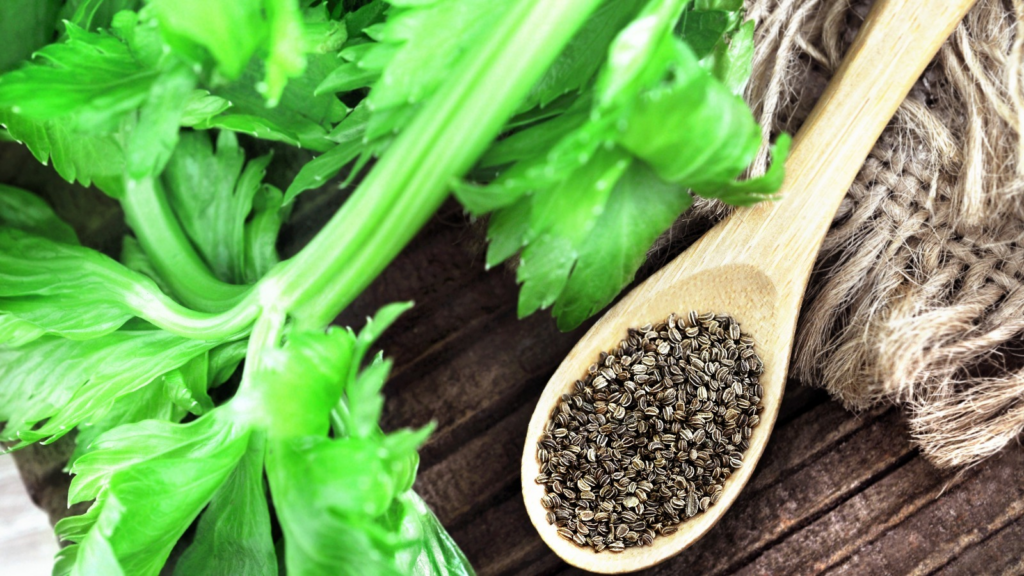
Celery Seed
Botanical Name Apium graveolens
Health Benefit: Anti-inflammatory and supports digestive health
- 1 teaspoon of celery seeds
- 2 cups of water
- Honey or lemon (optional)
Feel free to add a cinnamon stick or a slice of ginger for an extra zing!
Recipe Instructions:
1. Preparation of Celery Seeds:
- Firstly, start by measuring out 1 teaspoon of celery seeds. This is the perfect amount for a robust flavor without overpowering the delicate balance of the tea.
- If possible, use a mortar and pestle, gently crush the seeds. This helps to release the essential oils and flavors. If you don’t have a mortar and pestle, the back of a spoon against a cutting board works just as well.
2. Boiling Water:
- Secondly, pour 2 cups of fresh water into a small saucepan. If you have access to filtered water, even better! It can make a difference in the taste of your tea.
- Furthermore, bring the water to a gentle boil over medium heat. You’re looking for a rolling boil that moves the water vigorously.
3. Infusing the Tea:
- Once the water is boiling, add the crushed celery seeds to the saucepan.
- Turn the heat down to low, allowing the seeds to simmer. This slow infusion process is key to extracting the full flavor and benefits from the seeds.
- Afterwards, let the mixture simmer for about 10-15 minutes. This brewing time strikes the perfect balance between strength and subtlety.
4. Straining the Tea:
- After simmering, remove the saucepan from the heat.
- Moreover, place a fine-mesh strainer over your favorite mug or teapot and carefully pour the tea through it. This will catch all the seed particles, leaving you with a clear, inviting cup of tea.
Tips:
- Storing Your Brew: To maintain the freshness and flavor of your celery seed tea, store it in an airtight container in the refrigerator. It’s best enjoyed within 48 hours to ensure you’re sipping on its optimal taste and benefits.
- Adjusting Strength: If you find the flavor too strong, you can dilute the tea with a bit more water. Conversely, if you prefer a stronger brew, allow the seeds to simmer a little longer, checking every few minutes until it reaches your desired potency.
- Reusing Celery Seeds: Another tip is to not throw away those used celery seeds! They can be reused for a second brew. The second infusion will be milder, but still delightful.
Instructions to harvest plant seeds for your tea. Instructions and hyperlinks from Google search
How to Grow Cardamom: Harvest seeds
To harvest seeds, follow these steps:
- Shade Management: Cardamom plants need partial shade (50% sunlight). Tall trees are often planted to protect them.
- Pollination: Cardamom flowers bloom after 2–3 years of planting, attracting bees and insects.
- Harvesting: Harvest the pods before they fully ripen to retain their flavor. The pods are fragile, so they must be harvested by hand.
- Drying: After harvesting, the pods are washed and spread out to dry in the sun.
- Removing Seeds: Once the pods are fully dry, the seeds are removed by hand.
- Storage: Store the seeds in a cool, dry place until ready to use. 1
For a detailed guide on growing cardamom, from seed to harvest, including the steps for harvesting cardamom seeds,
Coriander: Harvest seeds
- Drying the Seeds:
- Hang the stems upside down in a cool, dry place away from direct sunlight. You can tie them together with twine or place them in a paper bag to catch any falling seeds. 2
- Allow the seeds to dry for about two weeks. They are ready when they feel dry and brittle.
- Collecting the Seeds:
- Once dried, gently rub the seed heads between your fingers over a bowl or tray to release the seeds. For stubborn pods, you can roll them lightly between your palms or use a mesh sieve. 1
- Remove any debris or stems from the collected seeds.
- Storing the Seeds:
- Ensure the seeds are completely dry before storing them in an airtight container. This helps prevent mold and preserves their viability for future planting or culinary use. 2
- Store the seeds in a cool, dark place to maintain their freshness. 1By following these steps, you can successfully harvest and store coriander seeds for your spice rack or for planting in the next growing season. Enjoy the satisfaction of using seeds that you have grown and harvested yourself!
Harvesting Fennel Seeds
Timing for Harvesting
- Optimal Time: Fennel seeds are ready to be harvested when the flower heads (umbels) have turned brown and dry, typically in late summer to early autumn. This usually occurs about 110-120 days after planting. 2
- Visual Cues: Look for a dull gray, tan, or light brown color on the seeds, indicating they have reached maximum flavor and oil concentration. The seeds should feel hard and firm to the touch.
Harvesting Process
- Cutting the Umbels: Use sharp shears or pruning scissors to cut the entire umbel head from the plant, leaving a few inches of stem for handling. It’s best to do this in the morning after any dew has evaporated but before the heat of the day. 1
- Collecting Seeds: Hold a container or paper bag underneath the umbel while cutting to catch any seeds that may fall during the process. This helps prevent loss of mature seeds. 1
- Drying the Seed Heads: Place the cut umbels upside down in a paper bag or on a clean tray in a warm, well-ventilated area. Allow them to air-dry for one to two weeks, gently shaking the bag every few days to help dislodge the seeds.
Extracting and Storing Seeds
- Separating Seeds: Once fully dried, rub the heads gently between your fingers or use a fine mesh sieve to separate the seeds from the stems and chaff. 1
- Storage: Store the seeds in an airtight container in a cool, dark place. Properly dried seeds can last for up to two years.
How to Harvest Fenogreek Seeds
Harvesting fenugreek seeds involves several steps to ensure the best quality and preservation. Here’s a detailed guide on how to harvest fenugreek seeds:
- Monitor Plant Maturity: The optimal time to harvest fenugreek seeds is when the pods turn brown and dry. Gently shake the plants to check if the seeds rattle inside the pods. 1
- Cut the Pods: Using a sharp knife or scissors, carefully cut the mature pods from the plants. Avoid cutting the stems, as this can damage the plant. 1
- Dry the Pods: Spread the pods on a clean cloth or paper towels in a well-ventilated area. Allow them to dry for several days or until they become brittle. 1
- Remove the Seeds: Once the pods are completely dry, crush them gently with your fingers or a rolling pin to release the seeds. 1
- Clean the Seeds: Spread the seeds on a clean surface and remove any remaining debris or pod fragments. 1
- Store the Seeds: Transfer the cleaned seeds to glass jars or airtight containers. Label the containers with the date and variety of fenugreek. 1
- Maintain Seed Viability: Store the fenugreek seeds in a cool, dry place away from direct sunlight. Under proper storage conditions, they can remain viable for up to 2 years.
Steps to Harvest Celery Seeds
- Wait for the Right Time: Celery is a biennial plant, meaning it will flower and produce seeds in its second year. You should wait until the flowers have turned light brown and dried out, indicating that the seeds are mature. Look for signs such as the stems turning yellow or brown. 2
- Cut the Seed Heads: Once the flowers are ready, carefully cut the flower heads from the celery plant. You can either cut them directly into a bag to minimize seed loss or cut them into a container and then transfer the seeds. 1
- Shake to Collect Seeds: After cutting the seed heads, shake them gently to release the seeds into your collection bag or container. This method helps ensure you gather as many seeds as possible without losing them during the cutting process. 1
- Dry the Seeds: If the seeds are not completely dry, spread them out on a paper towel or a clean surface to air dry for a few days. This step is crucial to prevent mold during storage. 1
- Store the Seeds: Once the seeds are fully dry, remove any debris and place them in a glass container with a tight-fitting lid. Label the container with the date and type of seed, and store it in a cool, dark place. Properly stored seeds can last for up to five years.