Sub-Total: $0.00
National Learn About Composting Day- May 29
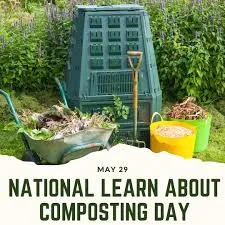
Get out your gardening gloves — May 29 is National Learn About Composting Day! We all want to do our part to conserve natural resources and reduce our carbon footprint. Composting is not only an environmentally safe fertilizer, but it can help you save water, energy, fuel, and money! It also keeps toxins from getting in our run-off and groundwater through the use of chemical- based commercial fertilizers. The use of a natural fertilizer made from compost will make your garden hospitable to wildlife helpers like honeybees, hummingbirds and of course, worms!
So, what it compost? Compost is organic matter that has decomposed. In a garden, decomposition is a good thing! Compost can be made from kitchen scraps, lawn clippings, newspapers, leaves wood chips, coffee grinds — almost any food products except for processed foods (no Twinkies in the compost!) and meat or fish products. Composting saves resources, and because of its high nutrient content, it adds to soil stability and reduces soil disease. It will help your garden grow lush and promote healthy growth in seedlings and plants. It’s for all these reasons gardeners call compost “black gold”. Composting allows you to accomplish the big environmental three: Reduce, Reuse and Recycle.
Great Web Sites about Composting:
International Compost Awareness Week (compostfoundation.org)
Composting Beginners Guide To Be More Zero Waste! – ZeroWasteStore.com
LEARN ABOUT COMPOSTING DAY TIMELINE
Stone Age First Composting
Even though the method of composting is around, it won’t be written about for another 10,000 years.
1750s‘America’s First Composter’
Founding Father George Washington is well-known as ‘America’s First Composter.’
1793Method to the Madness
According to the book “The Practical Farmer” by John Spurrier, Washington instructed his farm workers to, “Rake, and scrape up all the trash, of every sort and kind about the houses … and throw it … into the Stercorary.”
1850s Industrial Composting
Composting goes large-scale when Connecticut-based Stephen Hoyt famously composts over 200,000 fish and 17,500 bushels of manure in a single season.
WHAT IS MY FIRST STEP?
You will first need to decide what kind of composting container will work best for your living situation and your preferred method of composting. The great news is there are so many options to choose from, you can have a compost system whether you live on sprawling land or a teeny tiny apartment. You can use a regular old stationary compost bin to toss your composting scraps into. It’s low maintenance and holds a large capacity, but there’s no ideal method to mix and aerate the pile. This makes for a slower process that can take as long as 3-4 months for the compost to be ready. You might also consider worm bins, a popular choice if you live in an apartment building without land for an outdoor option. This method allows you turn your table scraps into useful compost material by cultivating special worms that essentially eat your garbage.
But my personal favorite and method of choice is a tumbler bin. Tumblers are large containers that sit on legs, and a handle on the side to spin it. This lets you easily mix the contents within it so you can aerate the pile whenever you need to. This means that with ideal conditions, you can get good nutrient-rich compost in as little as 3-4 weeks’ time!
Of course, you can skip a bin all together and create an open-air compost pile. Simply use a pitchfork to mix and aerate your pile when necessary. You may want to consider picking a discreet location with visual barriers and enough distance from neighbors in case your compost starts to get a little smelly.
WHERE SHOULD I PLACE MY COMPOST SYSTEM?
Healthy compost requires the right amount of sun, water and air to decompose properly, and where you place your bin plays a big part in how efficiently and effectively you are able to turn your table scraps into “black gold” for your garden! So while you plan out the ideal location for your compost bin, there are a few things to consider before you choose its site:
- Sufficient Area – Make sure you have at least a 3 square foot area for your bin and gardening tools such as a pitchfork and enough room to maneuver a wheelbarrow for transporting your stockpile.
- Ease of Access – Choose a spot that you can comfortably toss your table scraps and other organic materials into. If you have trees or a home garden, you may want to find a happy medium between your house and your plants.
- Sun/Water/Air – Choose a spot with moderate sunlight and easy access to a water supply. Heat and moisture is essential for your mixture to decompose properly. Try to find a location on your property that your water hose will reach in a partially shaded area. Your compost also needs air to breakdown its contents into yummy plant food. Pretty much any compost bin you buy will have a ventilation system to circulate the air. Make sure you place your bin in a spot where the vents are not blocked by vegetation or structures such as a wall or fence.
- Easy Drainage – Bare ground is perfect as the compost liquid (leachate) will quickly and easily be absorbed into the earth. Avoid placing your bin on cement that prohibits drainage from reaching the soil, or need wooden structures that can rot when in content with the decomposing debris and material.
WHAT CAN I COMPOST?
Before you start tossing scraps and waste into your new bin, you will need to understand some composting basics so you will know what can and can’t toss into your pile. Composting is strictly for organic nitrogen-based (greens) and carbon-based (browns) materials. A proper breakdown process requires your bin mixture have roughly 50% brown to 50% green.
Examples of Greens:
- Vegetable scraps
- Fruit scraps
- Bread
- Nut shells
- Egg shells
- Coffee grounds
- Tea bags
- Grass clippings
Examples of Browns:
- Dead tree leaves, branches and cones
- Sawdust and hay
- Untreated wood
- Newspapers
- Shredded mail
- Paper egg cartons
- Cork material
- Vacuum cleaner lint
WHAT SHOULD’NT I COMPOST?
This is not to say all organic materials should enter your compost bin. The decomposition process requires the necessary help of microorganisms, which are susceptible to certain bacteria. So it’s important to keep your bin free of items such as:
- Meat and bones
- Dairy products
- Fats and cooking oils
- Treated wood
- Dog and cat poop
- Weeds
- Diseased plants
- Grass clippings sprayed with pesticides/herbicides
- Plastic products
- Metal
HOW DO I START AND MAINTAIN MY COMPOST PILE?
You have your bin and picked the perfect spot to place it. You are now ready to start composting at home! Starting and maintaining healthy compost system is fun to learn and incredibly rewarding! Below are 5 basic composting steps necessary to turn your organic scraps into a rich-mature compost soil.
📷
- Layering – You will want to start by filling your bin in 3-6 inch layers, alternating between nitrogen-based green material and carbon-based brown. I personally like to fill our compost bin with 50/50 green and brown mix, and it seems to work the best for me. It’s also worth mentioning that the smaller the pieces are, the faster your compost cycle will take. So if you have a shredder, you can really speed things up!
- Watering – Add water every other layer, but not so much that it becomes waterlogged and soggy. You simply want the layers to feel moist. Continue layering and watering in this manner until you are happy with the amount inside your bin. There may be times when you will need to add more water during the cycle, if you notice your pile is getting too dry.
- Turning – Your compost needs air in order to decompose efficiently. Turning your compost regularly mixes up the materials and aerates the contents of your bin. Pitchforks can be used to turn open air systems. And if you can find one small enough, you can use it for stationary bins. Tumbler composting bins have a handle on the side that you use to rotate the bin and turn the materials inside. We love this feature on our tumbler.
- Repeat – You will need to repeat some of these steps during each compost cycle in order to maintain an ideal environment for the decomposition to take place. Take note of how your batch looks, feels, and smells to clue you in on what needs to be added to maintain a healthy pile. If the pile feels too dry and the compost has stalled, add more water. If it starts to smell like rotten eggs and/or feels slimy, add more brown material and turn to offset the greens and aerate the pile.
Living a low-waste lifestyle requires a dedication to the 3 R’s: Reduce, Reuse, and Recycle what we use and consume. That is why we love composting so much! We can reduce the waste we create by recycling our compostable scraps and reusing what we create in our bins to benefit the earth, our plants and gardens, and our lives altogether
